Introduction
This article describes the installation of Oracle Linux (Oracle Linux 6.5 64-bit) on Hyper-V. The Hyper-V server role in Windows Server lets you create a virtualized server computing environment, where you can create and manage virtual machines. You can run multiple operating systems on one physical system and isolate the operating systems from each other.
Before starting this exercise, you need an .iso file for the operating system that you would like to deploy. The Linux .iso file can be downloaded from the Oracle e-delivery site using your Oracle username and Password.
We will use this Virtual Machine for installing the Grid Infrastructure and 11g Database(Oracle 11.2 64-bit)
Virtual Machine setup
60 GB Hard Disk
Set the base memory to at least 6 GB
Set the hostname to ol6.localdomain
Mount Point Space Distribution
Mount Point Space Distribution
/ - 20 GB
Swap – 6.3 GB
/u01 – 30 GB
/home - 2 GB
/home - 2 GB
Virtual Machine Setup
Select the Hyper-V manager from Server manager>Tools>Hyper-V Manager. The Hyper-V manager will open
up. On the extreme Left you can see the Hostname. All the virtual Machines created will be displayed under the tab Virtual Machines. Here you can see the Name, State, CPU Usage, Assigned Memory, Up Time and Status of each Machine.
On the Extreme Right Side you can see the Different Hyper-V Manager Settings. Virtual Machine settings will be displayed under the Hyper-V Manager Settings once you select a machine.
Click on Hyper-V settings

Select Virtual Hard Disks and Provide the default location for the Virtual Hard Disk Files here.

Click on Virtual Machines and provide the default location for the Virtual Machine here.

Click Apply and OK
Now click on Virtual Switch Manager in Hyper-V Manager Settings to set up network for the virtual Environment.

Before you create a virtual machine in Hyper-V, you may want to provide a way for this virtual machine to connect to a physical network.

Provide a name for the Virtual Switch, and select External Network option. Then Select the Host machine network card from the drop down menu. This new virtual network card will be used as your Virtual Machines network card. Click on Apply and the OK.

Now your virtual Environment is ready to create the first virtual machine.
In Hyper-V Manager, click Action > New > Virtual Machine to bring up the New Virtual Machine Wizard.

Click Next

Provide a name for your Virtual Machine. This is the name Hyper-V uses for the virtual machine, not the computer name given to the guest operating system that will be deployed inside the virtual machine. Check the Box and Choose a location where the virtual machine files will be stored. Click Next.

If the new virtual machine is configured as Generation 2 and will be running a Linux distribution, secure boot will need to be disabled. This can be done after the virtual machine is created
Click Next.

Select 6144 MB for the Startup Memory value and leave Use Dynamic Memory selected. Dynamic Memory is a new Hyper-V feature that helps you use physical memory more efficiently.Memory is shared between a Hyper-V host and the virtual machine running on the host. The number of virtual machines that can run on a single host is in part dependent on available memory. When enabled, dynamic memory reclaims unused memory from the running virtual machine. This allows more virtual machines to run on the host.
Click the Next button.

On the Configure Networking wizard, select a virtual switch for the virtual machine and click Next.

Give the virtual hard drive a name, select a location, and finally specify the size as 60 GB. A virtual hard drive provides storage for a virtual machine similar to a physical hard drive. A virtual hard drive is required so that you can install an operating system on the virtual machine.
Click Next when ready.


Review the virtual machine details and click Finish to complete the virtual machine creation.

After the Virtual MAchine is created , It will Show up in the Virtual MAchines Section of the Hyper-V Manager.
Now we to change the boot order and un select the secure boot. for this select the virtual MAchine and click on settings.

Uncheck Enable secure Boot and Make sure DVD Drive is the first boot option.

Click on Integration Services and Enable Guest Services. Click OK


Skip the media testing.

Click Next

Select English Language. Next.

Select U.S.English Keyboard. Next.

Choose Basic Storage Devices. Next

Choose - Yes Discard any data. Next

Provide a fully qualified hostname for the computer. I named it ol6.localdomain. Next

Choose the time Zone. Next

Give root password. Next

Choose use all space.
Use All Space Removes all existing partitions and data. If you select this option, the installer creates the default layout on the installation disk.
Select Review and modify Partitioning Layout and click Next.

Edit Partitioning Layout. Select the Volume Group and Click on Edit.

Select the root mount point(/) and Click on Edit.

Enter the size of Mount point in MB. Set the Size as 20480 MB for root(/). Click OK.

Select lv_swap and click edit.

set the swap size as 6300 MB. Click OK

Select /home mount point and click edit. Provide the size as 2048 MB and Click OK

Now we will Create a new Mount point /u01. For this click on Add and provide the Mount Point as /u01 and allocate the remaining Free space to this mount point. And then Click OK

Now you can see the Space distribution. Click OK

Clik Next

Click Format.

Click Write changes to Disk.

Click Next.

Choose Database Server. Make sure Oracle Linux Server is checked in additional Repositories.
Select Customize now.
Click Next.

The "Package Group Selection" screen allows you to select the required package groups, and individual packages within the details section.
In the left-hand column, select a package category to display the associated package groups in the right-hand column.
Customize the server as per the below list.


When you have finished choosing the packages that you want to install, click Next.

The installer displays a status bar that shows the progress of the package installation along with the name of each package that is being installed.

After the packages have been installed, click Reboot to reboot the system.

Click Forward.

Accept the agreement. Forward.

Select No. Click on Forward.

Click on No thanks. Click Forward.

Click Forward.

Create a non-administrative user account.
We will create the users Later. Click Forward.

Set date ad time.Click Forward.

Uncheck Enable kdump. Click on Finish.

The login Screen will be displayed. Click on Other. and give root as the username and click login.

Provide the password for root

Check Do not show me this again and close.


Next configure the network. Update /etc/hosts file with the details below. Comment out the existing entries and save
127.0.0.1 localhost.localdomain localhost
192.168.2.104 ol6.localdomain ol6
Click on System>Preferences > Network Connections

Select System eth0 and click on Edit


Type ifconfig in terminal to check the IP Settings


Click on Virtual Machines and provide the default location for the Virtual Machine here.

Click Apply and OK
Now click on Virtual Switch Manager in Hyper-V Manager Settings to set up network for the virtual Environment.
Before you create a virtual machine in Hyper-V, you may want to provide a way for this virtual machine to connect to a physical network.
Each virtual switch created in Hyper-V can be configured with one of three connection types:
- External Network – the virtual switch is connected to a physical network adapter which provides connectivity between the physical network, the Hyper-V host, and the virtual machine. In this configuration, you can also enable or disable the host's ability to communicate over the physically connected network card. This can be useful to isolate only VM traffic to a particular physical network card.
- Internal Network – the virtual switch is not connected to a physical network adapter. However, network connectivity exists between the Hyper-V host and any virtual machines connected to this switch.
- Private Network – the virtual switch is not connected to a physical network adapter and connectivity does not exist between the Hyper-V host and any virtual machines connected to this switch.

Provide a name for the Virtual Switch, and select External Network option. Then Select the Host machine network card from the drop down menu. This new virtual network card will be used as your Virtual Machines network card. Click on Apply and the OK.

Now your virtual Environment is ready to create the first virtual machine.
In Hyper-V Manager, click Action > New > Virtual Machine to bring up the New Virtual Machine Wizard.

Click Next

Provide a name for your Virtual Machine. This is the name Hyper-V uses for the virtual machine, not the computer name given to the guest operating system that will be deployed inside the virtual machine. Check the Box and Choose a location where the virtual machine files will be stored. Click Next.

Select a generation for the machine.
Generation 2 virtual machines were introduced with Windows Server 2012 R2 and provide a simplified virtual hardware model and some additional functionality. You can only install a 64-bit operating system on a Generation 2 virtual machine.If the new virtual machine is configured as Generation 2 and will be running a Linux distribution, secure boot will need to be disabled. This can be done after the virtual machine is created
Click Next.

Select 6144 MB for the Startup Memory value and leave Use Dynamic Memory selected. Dynamic Memory is a new Hyper-V feature that helps you use physical memory more efficiently.Memory is shared between a Hyper-V host and the virtual machine running on the host. The number of virtual machines that can run on a single host is in part dependent on available memory. When enabled, dynamic memory reclaims unused memory from the running virtual machine. This allows more virtual machines to run on the host.
Click the Next button.

On the Configure Networking wizard, select a virtual switch for the virtual machine and click Next.

Give the virtual hard drive a name, select a location, and finally specify the size as 60 GB. A virtual hard drive provides storage for a virtual machine similar to a physical hard drive. A virtual hard drive is required so that you can install an operating system on the virtual machine.
Click Next when ready.

On the Installation Options wizard, select Install an operating system from a bootable image file and then select an operating system .iso file. This is similar to inserting a CD into the physical CD-ROM drive of a physical computer. To configure this option, select a .iso image. This image will be mounted to the virtual CD-ROM drive of the virtual machine. The boot order of the virtual machine is changed to boot first from the CD-ROM drive.
Click Next once completed.

Review the virtual machine details and click Finish to complete the virtual machine creation.

After the Virtual MAchine is created , It will Show up in the Virtual MAchines Section of the Hyper-V Manager.
Now we to change the boot order and un select the secure boot. for this select the virtual MAchine and click on settings.

Uncheck Enable secure Boot and Make sure DVD Drive is the first boot option.

Click on Integration Services and Enable Guest Services. Click OK

In order to finish building your virtual machine, you need to start the virtual machine and walk through the operating system installation.
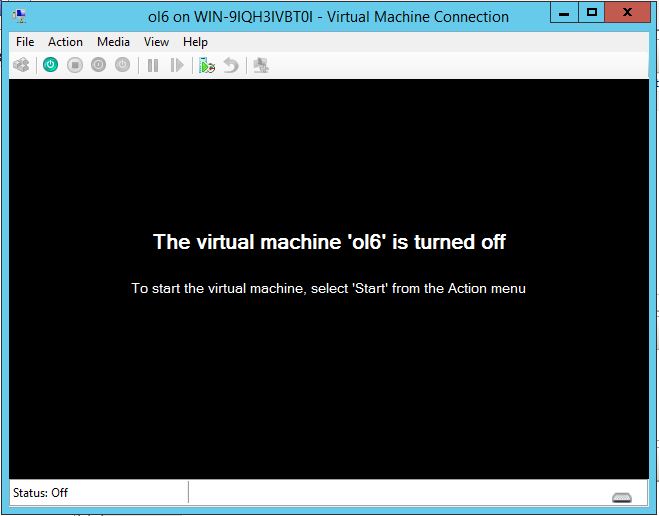
In Hyper-V Manager, double-click on the virtual machine. This launches the VMConnect tool.
In VMConnect, click on the green Start button. This is like pressing the power button on a physical computer. You may be prompted to ‘Press any key to boot from CD or DVD’. Go ahead and do so. You may need to click inside the VMConnect window to ensure that your keystrokes are sent to the virtual machine.
The virtual machine boots into setup and you can walk through the installation like you would on a physical computer.


Skip the media testing.

Click Next

Select English Language. Next.

Select U.S.English Keyboard. Next.

Choose Basic Storage Devices. Next

Choose - Yes Discard any data. Next

Provide a fully qualified hostname for the computer. I named it ol6.localdomain. Next

Choose the time Zone. Next

Give root password. Next

Choose use all space.
Use All Space Removes all existing partitions and data. If you select this option, the installer creates the default layout on the installation disk.
Select Review and modify Partitioning Layout and click Next.

Edit Partitioning Layout. Select the Volume Group and Click on Edit.

Select the root mount point(/) and Click on Edit.

Enter the size of Mount point in MB. Set the Size as 20480 MB for root(/). Click OK.

Select lv_swap and click edit.

set the swap size as 6300 MB. Click OK

Select /home mount point and click edit. Provide the size as 2048 MB and Click OK

Now we will Create a new Mount point /u01. For this click on Add and provide the Mount Point as /u01 and allocate the remaining Free space to this mount point. And then Click OK

Now you can see the Space distribution. Click OK

Clik Next

Click Format.

Click Write changes to Disk.

Click Next.

Choose Database Server. Make sure Oracle Linux Server is checked in additional Repositories.
Select Customize now.
Click Next.

The "Package Group Selection" screen allows you to select the required package groups, and individual packages within the details section.
In the left-hand column, select a package category to display the associated package groups in the right-hand column.
Customize the server as per the below list.
Base System > Base
Base System > Client management tools
Base System > Compatibility libraries
Base System > Hardware monitoring utilities
Base System > Large Systems Performance
Base System > Network file system client
Base System > Performance Tools
Base System > Perl Support
Servers > Server Platform
Servers > System administration tools
Servers > FTP Server
Servers > FTP Server
Desktops > Desktop
Desktops > Desktop Platform
Desktops > Fonts
Desktops > General Purpose Desktop
Desktops > Graphical Administration Tools
Desktops > Input Methods
Desktops > X Window System
Applications > Internet Browser
Development > Additional Development
Development > Development Tools


When you have finished choosing the packages that you want to install, click Next.

The installer displays a status bar that shows the progress of the package installation along with the name of each package that is being installed.

After the packages have been installed, click Reboot to reboot the system.

Click Forward.

Accept the agreement. Forward.

Select No. Click on Forward.

Click on No thanks. Click Forward.

Click Forward.

Create a non-administrative user account.
We will create the users Later. Click Forward.

Set date ad time.Click Forward.

Uncheck Enable kdump. Click on Finish.

The login Screen will be displayed. Click on Other. and give root as the username and click login.
Provide the password for root
Check Do not show me this again and close.

The desktop will be displayed.

Next configure the network. Update /etc/hosts file with the details below. Comment out the existing entries and save
127.0.0.1 localhost.localdomain localhost
192.168.2.104 ol6.localdomain ol6
Click on System>Preferences > Network Connections

Select System eth0 and click on Edit

Check both Connect automatically and Available to all users.
Select IPV4 Settings.

Select Manual from the Method drop down menu. Add the details as below.
Address 192.168.2.104
Netmask 255.255.255.0
Gateway 192.168.2.1
Click on Apply.

Type ifconfig in terminal to check the IP Settings


No comments:
Post a Comment